

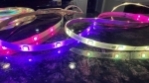
How to Restore a Damaged LED Strip: A Step-by-Step Guide
How to Restore a Damaged LED Strip: A Step-by-Step Guide
Are you in search of a solution to repair your torn LED strip? Look no further! In this blog post, we will walk you through the process of fixing a ripped LED strip lights yourself, using a few simple steps. LED strip lights are an excellent way to bring a modern and sophisticated look to any space.
Whether you want to enhance the ambiance of your home or hide unsightly objects, LED strips can instantly upgrade your living space. Unfortunately, wear and tear or mechanical failures can cause your LED strips to get damaged.
But fret not! We’ve got you covered with detailed guidance on how to fix a ripped LED strip, so it looks as good as new again, with minimal effort and resources!
What Can Ripped LED Strips Be Used For?
Ripped LED strips have various uses. They can be used to illuminate walls and counters, cover unsightly objects, or for decorative purposes. Additionally, if you want to create a dramatic effect in your home or office, LED strips are perfect for the job.
With their low power consumption and long lifespan, you can utilize LED strips in many different ways. Overall, LED strips are a great way to add a modern touch to any space.
Essential Tools and Materials
To repair a ripped LED strip, you’ll need a few items:
- LED Strip Light Tape
- Electrical tape
- Pair of scissors
- Exacto knife (optional)
Once you have these items at hand, you can proceed with the repair process.
How to Fix a Ripped LED Strip in 10 Easy Steps
Step 1: Identify the Rip
Begin by locating the ripped area on your LED strip and assess its severity. Take note of the distance between the two sides of the rip, as this will determine the amount of LED Strip Light Tape required. If there is any excess material around the rip, you can trim it using an Exacto knife.
Step 2: Trim the Torn Section
Using a pair of scissors, carefully remove any damaged material from the LED strip. Leave enough space on both sides of the rip to easily tape them back together. If the rip is too long, trim off any excess material with an Exacto knife.
Step 3: Apply LED Strip Light Tape
Once you have cleared the ripped area, use the LED Strip Light Tape to cover both sides of the rip, ensuring there is no gap between them. If there is a gap, secure the ends with electrical tape. Don’t worry if the LED Strip Light Tape doesn’t fit perfectly; it will still serve its purpose.
Step 4: Secure the Tape
To ensure the LED Strip Light Tape stays in place, use electrical tape to secure it. Wrap the electrical tape around both sides of the rip, pressing firmly to prevent water and dirt from entering the LEDs. Be careful not to overlap the electrical tape too much, as it may cause a short circuit.
Step 5: Test the LED Strip
After taping up the rip, it’s time to test your repair work. Plug in the LED strip and ensure all the lights are functioning properly. If everything appears to be in order, you’re done! If any lights are not working, you may need to adjust the positioning of the tape.
Step 6: Reinstall the LED Strip
Once you have tested the LED strip and verified that all the lights are functioning, reinstall the repaired strip in its original position. If possible, try to match the original placement before cutting away any material. This will ensure that everything looks as good as new!
>>> Follow us to discover the Best led light strips
Step 7: Clean Up Any Residue
After reinstalling the LED strip, take a few minutes to clean up any residue or dust that may have been left behind during the repair process. This simple step will keep your LEDs looking neat and tidy for years to come. You can use a damp cloth or an air compressor to remove any dust from the surface.
Step 8: Seal the Strip
To protect your LED strip from moisture damage, seal the ends with waterproof tape. This will prevent water from entering and ensure that your LEDs remain safe and dry. For additional protection, you can also use electrical tape. Apply firm pressure to ensure the tape stays in place, even when exposed to water.
Step 9: Reconnect the LED Strip
Once you have sealed the ends of your LED strip, reconnect it to the power source. Carefully reconnect all the wires to their original positions, ensuring everything is tightly secured before turning on your lights. Tighten any loose connections before powering on your lights.
Step 10: Enjoy Your Restored LED Strip
Congratulations! You have successfully repaired your LED strip and can now enjoy its bright and vibrant colors once again. With a little patience and the right tools, you can easily breathe new life into your LED strip. So go ahead, fix those rips, and enjoy the transformation!
5 Additional Tips and Tricks
- Check the LEDs: If any individual LED lights are not working, you can replace them by cutting along the strip and inserting new ones.
- Consider using shrink tubing: This is an excellent way to secure a new connection, ensuring that the strip does not come apart easily.
- Soldering is an option: If you’re comfortable with it, soldering can effectively repair a ripped LED strip.
- Combine soldering with heat shrink tubing: This combination enhances the security of your repair job and provides proper insulation against moisture and dust.
- Opt for waterproof LED strips: If you plan to install LED strips outdoors or near water sources, consider using waterproof ones. These are designed to withstand more extreme weather conditions than regular LED strips.
With these additional tips and tricks, you have all the tools necessary to effectively fix a ripped LED strip. Take your time, use the right materials and tools for each step, and be patient. You’ll soon have your LED strip shining brightly once again!
5 Things to Avoid
- Don’t use tape or glue directly on the tear as a permanent solution; it is likely to fail in the long run.
- Avoid stretching out the LED strip to fix a rip; doing so can damage the circuitry, rendering it unusable.
- Electrical tape should not be used as a repair tool; its adhesive may break down over time, causing further issues with your LED strip lighting.
- Avoid cutting off damaged sections without measuring the number of LEDs needed beforehand.
- If the LED strip repair seems complex, it is advisable to seek professional help to ensure proper and safe fixes. Enlisting expert knowledge and assistance guarantees the repair is done correctly and safely.
Keeping these tips in mind will help your LED strip repairs go smoothly, allowing you to enjoy beautiful lighting once again. By following these steps, you’ll restore your lighting system to its former glory. Good luck!
Will Super Glue Cause Damage to LED Lights?
Using super glue on LED lights is not recommended as it can damage the circuitry, potentially causing permanent harm. Furthermore, super glue may not provide a strong enough bond to effectively repair a torn LED strip.
Heat shrink tubing, soldering, or electrical tape are better options for more reliable and lasting repairs. If you’re unsure about fixing a ripped LED strip, it’s best to seek professional help from an electrician.
Overall, it’s wise to avoid using super glue on LED lights to prevent any potential damage. With the right tools and materials, you can easily repair a torn LED strip, restoring it to its former glory!
Conclusion
Now that you know how to fix a ripped LED lights, you can avoid the hassle of replacing the entire setup. With a little care and attention, you can extend the lifespan of your lights. Handle the strips delicately and avoid over-bending them.
Perform occasional maintenance checks to ensure all soldered points remain secure. When replacing bulbs, ensure they have the same voltage ratings to prevent overloading the strip and causing further damage.
We hope this article has provided you with useful information and the confidence to carry out DIY repairs. With these tips, you’ll have your lighting system back in top condition in no time. Good luck and happy repairing!


All States
Alabama
Alaska
Arizona
Arkansas
California
Colorado
Connecticut
DC
Delaware
Florida
Georgia
Hawaii
Idaho
Illinois
Indiana
Iowa
Kansas
Kentucky
Louisiana
Maine
Maryland
Massachusetts
Michigan
Minnesota
Mississippi
Missouri
Montana
Nebraska
Nevada
New Hampshire
New Jersey
New Mexico
New York
North Carolina
North Dakota
Ohio
Oklahoma
Oregon
Pennsylvania
Rhode Island
South Carolina
South Dakota
Tennessee
Texas
Utah
Vermont
Virginia
Washington
West Virginia
Wisconsin
Wyoming
Answers
(0)POST YOUR ANSWER